Here’s an example of the source code:
<style data-wp-block-html="css">
/*
 * ESP32 -> Favoriot MQTT Example
 * ------------------------------
 * - Connects to Wi-Fi
 * - Connects to Favoriot MQTT broker (non‑secure port 1883)
 * - Publishes a JSON payload to {access_token}/v2/streams
 * - Subscribes to {access_token}/v2/streams/status
 * - Reconnects automatically if connection drops
 * - Non‑blocking loop (no delay())
 */

#include <WiFi.h>
#include <PubSubClient.h>
#include <ArduinoJson.h>   // for easier JSON building

// ================== Wi‑Fi Credentials ==================
const char* WIFI_SSID     = "YOUR_WIFI_SSID";
const char* WIFI_PASSWORD = "YOUR_WIFI_PASSWORD";

// ================== Favoriot Credentials ==================
const char* DEVICE_DEVELOPER_ID = "deviceDefault@your_username"; // e.g., deviceDefault@favoriot
const char* ACCESS_TOKEN        = "your_device_access_token";    // from Favoriot platform

// ================== MQTT Broker Configuration ==================
const char* MQTT_HOST = "mqtt.favoriot.com";
const int   MQTT_PORT = 1883;   // 1883 = plain TCP, 8883 = TLS (secure)
// For TLS, you would need additional certificates and use WiFiClientSecure – see notes below.

WiFiClient espClient;
PubSubClient client(espClient);

// Topics
const String PUBLISH_TOPIC   = String(ACCESS_TOKEN) + "/v2/streams";           // publish data
const String SUBSCRIBE_TOPIC = String(ACCESS_TOKEN) + "/v2/streams/status";   // receive status

// ================== Timing ==================
const unsigned long PUBLISH_INTERVAL = 10000;  // publish every 10 seconds
unsigned long lastPublishTime = 0;

// ------------------------------------------------------------------
// Connect to Wi‑Fi
// ------------------------------------------------------------------
void setupWiFi() {
  Serial.print("Connecting to Wi‑Fi");
  WiFi.mode(WIFI_STA);
  WiFi.begin(WIFI_SSID, WIFI_PASSWORD);
  while (WiFi.status() != WL_CONNECTED) {
    delay(500);
    Serial.print(".");
  }
  Serial.println("\n✅ Connected to Wi‑Fi. IP: " + WiFi.localIP().toString());
}

// ------------------------------------------------------------------
// Reconnect to MQTT broker (called when connection lost)
// ------------------------------------------------------------------
void reconnectMQTT() {
  while (!client.connected()) {
    Serial.print("Attempting MQTT connection...");
    // Use access token as username AND password
    if (client.connect("ESP32Client", ACCESS_TOKEN, ACCESS_TOKEN)) {
      Serial.println("✅ Connected to MQTT");
      // Resubscribe to status topic
      client.subscribe(SUBSCRIBE_TOPIC.c_str());
    } else {
      Serial.print("❌ Failed, rc=");
      Serial.print(client.state());
      Serial.println(" try again in 5 seconds");
      delay(5000);  // Wait 5s before retrying
    }
  }
}

// ------------------------------------------------------------------
// Callback for subscription (status messages)
// ------------------------------------------------------------------
void callback(char* topic, byte* payload, unsigned int length) {
  Serial.print("Message arrived on topic: ");
  Serial.println(topic);
  Serial.print("Payload: ");
  for (int i = 0; i < length; i++) {
    Serial.print((char)payload[i]);
  }
  Serial.println();
}

// ------------------------------------------------------------------
// Build JSON payload and publish
// ------------------------------------------------------------------
void publishData() {
  // Use ArduinoJson to create the payload
  StaticJsonDocument<256> jsonDoc;
  jsonDoc["device_developer_id"] = DEVICE_DEVELOPER_ID;

  // Replace this with actual sensor reads (e.g., temperature, humidity, etc.)
  JsonObject data = jsonDoc.createNestedObject("data");
  data["temperature"] = 25.3;   // example value
  data["humidity"]    = 60.1;
  data["sensor_id"]   = "esp32-01";

  // Serialize to a char buffer
  char buffer[256];
  serializeJson(jsonDoc, buffer);

  Serial.print("Publishing: ");
  Serial.println(buffer);

  // Publish to the topic
  if (client.publish(PUBLISH_TOPIC.c_str(), buffer)) {
    Serial.println("✅ Published successfully");
  } else {
    Serial.println("❌ Publish failed");
  }
}

// ------------------------------------------------------------------
// Arduino setup
// ------------------------------------------------------------------
void setup() {
  Serial.begin(115200);
  setupWiFi();

  // Configure MQTT
  client.setServer(MQTT_HOST, MQTT_PORT);
  client.setCallback(callback);
}

// ------------------------------------------------------------------
// Arduino loop (non‑blocking)
// ------------------------------------------------------------------
void loop() {
  if (!client.connected()) {
    reconnectMQTT();
  }
  client.loop();  // keep the MQTT connection alive

  // Publish data at intervals
  if (millis() - lastPublishTime >= PUBLISH_INTERVAL) {
    publishData();
    lastPublishTime = millis();
  }
}
</style>

<script data-wp-block-html="js">
/*
 * ESP32 -> Favoriot MQTT Example
 * ------------------------------
 * - Connects to Wi-Fi
 * - Connects to Favoriot MQTT broker (non‑secure port 1883)
 * - Publishes a JSON payload to {access_token}/v2/streams
 * - Subscribes to {access_token}/v2/streams/status
 * - Reconnects automatically if connection drops
 * - Non‑blocking loop (no delay())
 */

#include <WiFi.h>
#include <PubSubClient.h>
#include <ArduinoJson.h>   // for easier JSON building

// ================== Wi‑Fi Credentials ==================
const char* WIFI_SSID     = "YOUR_WIFI_SSID";
const char* WIFI_PASSWORD = "YOUR_WIFI_PASSWORD";

// ================== Favoriot Credentials ==================
const char* DEVICE_DEVELOPER_ID = "deviceDefault@your_username"; // e.g., deviceDefault@favoriot
const char* ACCESS_TOKEN        = "your_device_access_token";    // from Favoriot platform

// ================== MQTT Broker Configuration ==================
const char* MQTT_HOST = "mqtt.favoriot.com";
const int   MQTT_PORT = 1883;   // 1883 = plain TCP, 8883 = TLS (secure)
// For TLS, you would need additional certificates and use WiFiClientSecure – see notes below.

WiFiClient espClient;
PubSubClient client(espClient);

// Topics
const String PUBLISH_TOPIC   = String(ACCESS_TOKEN) + "/v2/streams";           // publish data
const String SUBSCRIBE_TOPIC = String(ACCESS_TOKEN) + "/v2/streams/status";   // receive status

// ================== Timing ==================
const unsigned long PUBLISH_INTERVAL = 10000;  // publish every 10 seconds
unsigned long lastPublishTime = 0;

// ------------------------------------------------------------------
// Connect to Wi‑Fi
// ------------------------------------------------------------------
void setupWiFi() {
  Serial.print("Connecting to Wi‑Fi");
  WiFi.mode(WIFI_STA);
  WiFi.begin(WIFI_SSID, WIFI_PASSWORD);
  while (WiFi.status() != WL_CONNECTED) {
    delay(500);
    Serial.print(".");
  }
  Serial.println("\n✅ Connected to Wi‑Fi. IP: " + WiFi.localIP().toString());
}

// ------------------------------------------------------------------
// Reconnect to MQTT broker (called when connection lost)
// ------------------------------------------------------------------
void reconnectMQTT() {
  while (!client.connected()) {
    Serial.print("Attempting MQTT connection...");
    // Use access token as username AND password
    if (client.connect("ESP32Client", ACCESS_TOKEN, ACCESS_TOKEN)) {
      Serial.println("✅ Connected to MQTT");
      // Resubscribe to status topic
      client.subscribe(SUBSCRIBE_TOPIC.c_str());
    } else {
      Serial.print("❌ Failed, rc=");
      Serial.print(client.state());
      Serial.println(" try again in 5 seconds");
      delay(5000);  // Wait 5s before retrying
    }
  }
}

// ------------------------------------------------------------------
// Callback for subscription (status messages)
// ------------------------------------------------------------------
void callback(char* topic, byte* payload, unsigned int length) {
  Serial.print("Message arrived on topic: ");
  Serial.println(topic);
  Serial.print("Payload: ");
  for (int i = 0; i < length; i++) {
    Serial.print((char)payload[i]);
  }
  Serial.println();
}

// ------------------------------------------------------------------
// Build JSON payload and publish
// ------------------------------------------------------------------
void publishData() {
  // Use ArduinoJson to create the payload
  StaticJsonDocument<256> jsonDoc;
  jsonDoc["device_developer_id"] = DEVICE_DEVELOPER_ID;

  // Replace this with actual sensor reads (e.g., temperature, humidity, etc.)
  JsonObject data = jsonDoc.createNestedObject("data");
  data["temperature"] = 25.3;   // example value
  data["humidity"]    = 60.1;
  data["sensor_id"]   = "esp32-01";

  // Serialize to a char buffer
  char buffer[256];
  serializeJson(jsonDoc, buffer);

  Serial.print("Publishing: ");
  Serial.println(buffer);

  // Publish to the topic
  if (client.publish(PUBLISH_TOPIC.c_str(), buffer)) {
    Serial.println("✅ Published successfully");
  } else {
    Serial.println("❌ Publish failed");
  }
}

// ------------------------------------------------------------------
// Arduino setup
// ------------------------------------------------------------------
void setup() {
  Serial.begin(115200);
  setupWiFi();

  // Configure MQTT
  client.setServer(MQTT_HOST, MQTT_PORT);
  client.setCallback(callback);
}

// ------------------------------------------------------------------
// Arduino loop (non‑blocking)
// ------------------------------------------------------------------
void loop() {
  if (!client.connected()) {
    reconnectMQTT();
  }
  client.loop();  // keep the MQTT connection alive

  // Publish data at intervals
  if (millis() - lastPublishTime >= PUBLISH_INTERVAL) {
    publishData();
    lastPublishTime = millis();
  }
}
</script>
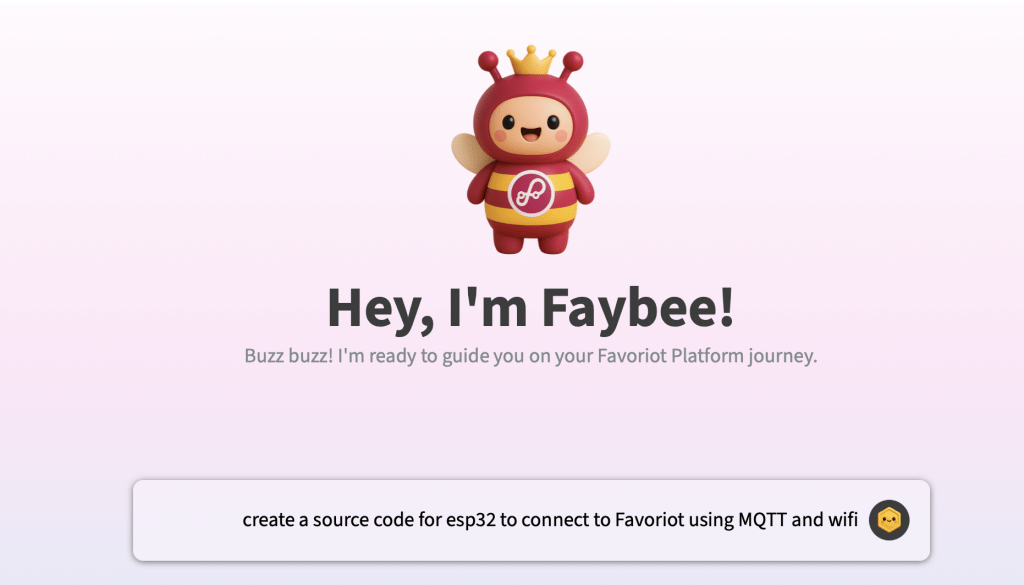
Or you can use Favoriot’s Faybee Chatbot to help you generate the sample code or any help that you want.
The source code above has been generated through the prompt shown below..